Subjects and Records
Subjects are the anchor for uploads, reports, and audit history. This page covers creating subjects and archiving records.
Creating a subject
Who: Study Admins (Uploaders and Readers cannot create subjects unless they also hold an admin role).
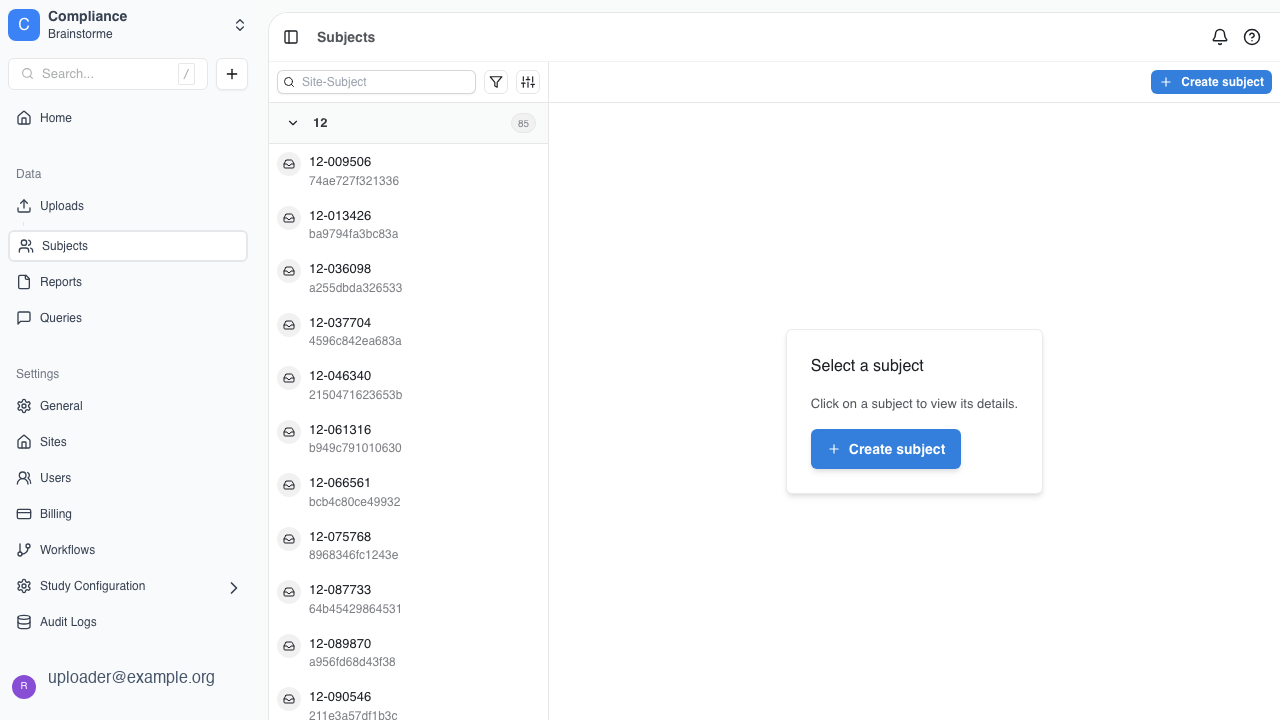
Where: Data → Subjects
Steps
- Open the Subjects screen and click Create Subject.
- In the Create Subject drawer:
- Select Site.
- Enter the Subject ID — numeric identifiers only (no punctuation).
- Set the Index Date and Time (the subject's reference date for timepoint windows).
- Click Create Subject.
- A Subject created confirmation appears and the new subject shows in the list.
Each subject is labeled as site-subject (for example 067-123456) throughout the portal, uploads table, audit log, and exports.
Index date
The index date and time is the subject's reference point — the moment every timepoint's visit window is measured from. A timepoint defined as "24–72 hours" means 24–72 hours after this anchor, so getting it right is what makes an upload land inside its window instead of being flagged as out of window.
What counts as the index date is set by your study protocol. Depending on the protocol it may be stroke onset, last known well, the time of randomisation, the time of the qualifying scan, or the time of enrolment. If you are unsure, check the protocol or ask the study administrator — do not guess.
How the anchor is resolved when a window is checked:
- If the study has a timepoint marked as its index timepoint and the subject already has an upload at that timepoint, the acquisition date read from that upload's DICOM is used.
- Otherwise the index date and time entered on this screen is used.
- If neither is available, the window check is skipped.
That means the value you enter here governs the subject's windows until an index-timepoint upload exists. Enter it in the site's local time, and include the time as well as the date — timepoints measured in hours cannot be evaluated from a date alone.
Changing a subject's index date later shifts every window that is still anchored to it. Correct it if it was entered wrong, but expect timepoint statuses to move as a result.
Before uploading to a new subject
- Confirm the subject appears under the correct site.
- Verify study timepoints are configured (Management → Timepoints). Uploads require at least one timepoint with accepted modalities.
Viewing subject details
Click a subject row to open the subject detail view. From here admins can review associated uploads, metadata, and — when appropriate — archive the subject.
The CRFs tab holds the forms the site fills in for this subject: the subject report, plus any per-timepoint case report forms. See Subject CRFs.
Archiving a subject
Archiving removes a subject from normal views while retaining full history in the audit log.
Who: Study Admins
Steps
- Open Data → Subjects and click the subject to archive.
- Click Archive Subject.
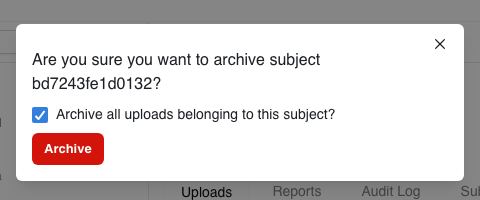
- In the confirmation dialog:
- Review the warning message.
- Optionally check Archive all uploads belonging to this subject to archive associated uploads at the same time.
- Click Archive to confirm.
- A Subject archived successfully message appears.
After archiving
- The subject no longer appears in the default Subjects list.
- The Audit Log records the status change (
NONE → ARCHIVED) with the acting user, timestamp, and retained prior history.
Archived records remain in the system for compliance and retention — they are hidden from routine workflows, not deleted.
Audit trail for subject actions
Subject creation and archival are captured in the study audit log. See Audit Logs for how to review these entries.